SOLVED Windows could not complete the installation.

Status
Not open for further replies.
Joined
Dec 11, 2009
Messages
4
Reaction score
1
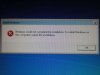
Have new Dell machine that came preloaded with Win 7 Pro 64bit. I setup machine and ran sysprep with the audit and generalize options then made image using imagex. Now I restart machine and I get error message "Windows could not complete the installation. To install windows on this computer restart the installation". Only option is OK and machine reboots and trys again and it is an endless loop. Anyone encounter this?
 

Attachments

Nibiru2012

Quick Scotty, beam me up!
Joined
Oct 27, 2009
Messages
4,955
Reaction score
1,302
Have you tried contacting Dell "No Customer Service"? They should be able to help you. Did Dell send a recovery disk or system disk with the computer?

If you want all of Dell's "extra software" this is the route you should follow.

If it was me, I would just download the Windows 7 Pro x64 from the following link and go from there. Dell puts a ton of "bloatware" on their systems. Plus Windows 7 will natively install virtually all the drivers you need, and update them through Windows Update, if necessary.

You can also install Driver Genius Pro which will update ALL drivers to the very latest versions.

Download the ISO image and burn it to a DVD with ImgBurn at 4x and then use your Product Key to activate it.

http://msft-dnl.digitalrivercontent.net/msvista/pub/X15-65805/X15-65805.iso
 
Joined
Dec 11, 2009
Messages
4
Reaction score
1
Hi, thanks for your response. Dell doesn't offer support for sysprep related issues so they weren't an option. I resorted to reloading, I was trying to avoid that. I had just spent an entire day getting the machine setup and loaded with all of our corporate software and setup with our standard corporate desktop and got it ready for cloning for our other 100 machines that are coming in. I didn't want to have to do it all again, but that is what I did! I havent attempted sysprep again yet though, but I imaged it as is before using sysprep this time so if sysprep mucks it up again, I got an image to resort to! Wish me luck!
 

Nibiru2012

Quick Scotty, beam me up!
Joined
Oct 27, 2009
Messages
4,955
Reaction score
1,302
Hi, thanks for your response. Dell doesn't offer support for sysprep related issues so they weren't an option. I resorted to reloading, I was trying to avoid that. I had just spent an entire day getting the machine setup and loaded with all of our corporate software and setup with our standard corporate desktop and got it ready for cloning for our other 100 machines that are coming in. I didn't want to have to do it all again, but that is what I did! I havent attempted sysprep again yet though, but I imaged it as is before using sysprep this time so if sysprep mucks it up again, I got an image to resort to! Wish me luck!
Oh Okay! I didn't realize you were doing all that prep for corporate use. Wow! That's a lot of work on your part. Does this use the MS AIK setup? Just curious.

Good Luck! I hope all goes well for ya!
 
Joined
Dec 11, 2009
Messages
4
Reaction score
1
Yea, the imaging is part of the AIK pkg. Sysprep is different though and has been around back to XP days, it strips all the unique identifiers so you can setup all the pertinent stuff on one machine such as printers, software, personal preferences, default profiles, etc and clone the disk and put it on multiple machines so you dont have to setup every machine. The key is that they must be identical machines that you put the image on. I would use Norton Ghost to image the drive once I set it up and ran sysprep on it. AIK came along in Vista and allows alot more. I am struggling to work with AIK and don't yet call it a friend! The major plus to AIK is it allows you to work with the image file and add and remove drivers and other features of windows and allows an image to be built and used on any hardware even if its not identical. Imagex is part of AIK and does the actual cloning so Ghost is not necessary.
 
Joined
Feb 11, 2010
Messages
1
Reaction score
1
I found the solution to this issue. Audit mode uses the built in Administrator account, which is not enabled by default on Vista/Win7. If you want to use Audit mode to install and test software or settings, you need to enabled the Administrator account first. Or if you are sure that you are ready to image the machine, use "Enter OOBE" instead of "Audit mode", then image the machine.
 
Joined
Apr 8, 2010
Messages
1
Reaction score
0
Please try the followings. It works for me.

- Reclone Windows 7. Do not start it yet.
- Insert the Windows 7 CD and boot it up. Click Repair and click to open a command prompt.
- Execute notepad to edit the file c:\windows\panther\unattend.xml. Change the SkipMachineOOBE and SkipUserOOBE options to "true". Save the file.
- Remove the CD and reboot. Now Windows should be able to start up.
- Run Windows System Image Manager to fix the error in the answer file, especially in the OOBE sections. In my case, I got something wrong in Local Accounts settings and get sucks.

Please let me know the result. Good luck.
 
Joined
Jan 10, 2011
Messages
1
Reaction score
0
Solution

There is no c:\windows\panther\unattend.xml file in the WDS imaged W7 installation...

Found the solution: The DELL's machine's BIOS has the "SATA Operation" setting in "RAID on" or "AHCI" mode. This setting is good for W7 install and image creation. (And gives the best disk performance if everything is working) But this is not good when restoring the image from the WDS server...
FIX: Put this setting back to ATA in BIOS and do the WDS image load again. Woila, the W7 will mini-install and boot up normaly. After all settings are done, you may download the machine specific AHCI driver and install it. Don't forget to set back the BIOS setting after you install the AHCI driver BEFORE start the W7 again.
 
Joined
Feb 9, 2011
Messages
1
Reaction score
1
Here's what I did to solve it for myself (I had run sysprep /generalize /oobe to move my machine from an AMD to an Intel platform):

1) Get the command prompt with Shift-F10.
2) Run services.msc and turn anything that you disabled yourself to Automatic (use your head here, for example Nero's NMIndexService can stay off), in case you've done services tweaking like I did.
3) Ensure the sptd service is disabled if you have it installed (used for virtual CD/ISO-mounting apps), you do this with regedit, it'll be in HKLM\System\CurrentControlSet\Services I believe.
4) Reboot
5) Command prompt again, cd to \Windows\System32\oobe and run msoobe
6) Create a new user and go through the steps.
After the OOBE part was done, I just got a black screen instead of going to desktop. Just sat there, so I powered off and rebooted. After reboot, it logged me into the new user I had created.
7) Log back into your old user, all should be fine now.

Hope this helps someone out there.
 
Joined
Feb 24, 2011
Messages
1
Reaction score
0
Thanks Gypsy, I tweaked yours a bit to work for me

Thanks Gypsy. I tweaked your post a bit and did the following:

After getting the command prompt:
I ran MMC > Add Remove Snap In > Computer Management > System Tools > Users to change my Administrator password to meet the requirements.

Then

Add Remove Snap In >Group Policy Object > Local Computer >Computer Configuration > Windows Settings>Security Settings>Local Policies>Security Option and changed "Accounts: Administrator Accounts status" to enabled. From there a restart and "bob's your uncle"!
 
Joined
Jun 21, 2011
Messages
1
Reaction score
0
nice one

Saved me a whole headache of pain. although there is a a decent amount of information and walk throughs out there now, its still lacking in the troubleshooting area.

I followed mbjsbj route and worked a treat. i had left it downloading updates overnight and came mack to a locked pc with no knowledge of the admin password, so rebooted and it was locked out.

Hence that workaround was perfect. CHEEERS

BTW any one know any really good resources for MDT 2010?
 
Last edited:
Joined
Jun 28, 2011
Messages
1
Reaction score
0
windows could not complete the installation. to install windows on this computer rest

Here's what I did to solve it for myself (I had run sysprep /generalize /oobe to move my machine from an AMD to an Intel platform):

1) Get the command prompt with Shift-F10.
2) Run services.msc and turn anything that you disabled yourself to Automatic (use your head here, for example Nero's NMIndexService can stay off), in case you've done services tweaking like I did.
3) Ensure the sptd service is disabled if you have it installed (used for virtual CD/ISO-mounting apps), you do this with regedit, it'll be in HKLM\System\CurrentControlSet\Services I believe.
4) Reboot
5) Command prompt again, cd to \Windows\System32\oobe and run msoobe
6) Create a new user and go through the steps.
After the OOBE part was done, I just got a black screen instead of going to desktop. Just sat there, so I powered off and rebooted. After reboot, it logged me into the new user I had created.
7) Log back into your old user, all should be fine now.

Hope this helps someone out there.
this worked to setup a new profile...thanks...the only problem is that i cant find the original boot screen options with the 3 profiles i had and the original computer name (i had to create a new computer name with your method)
 
Joined
Aug 9, 2011
Messages
1
Reaction score
0
Thanks Gypsy. I tweaked your post a bit and did the following:

After getting the command prompt:
I ran MMC > Add Remove Snap In > Computer Management > System Tools > Users to change my Administrator password to meet the requirements.

Then

Add Remove Snap In >Group Policy Object > Local Computer >Computer Configuration > Windows Settings>Security Settings>Local Policies>Security Option and changed "Accounts: Administrator Accounts status" to enabled. From there a restart and "bob's your uncle"!
This worked for me...after joining it to our domain it must have enforced the password complexity requirements. It also disabled the Administrator account.

THANKS FOR THE POST!!!
 
Joined
Nov 2, 2011
Messages
1
Reaction score
0
Very helpful!

I went an easier route.
1. Get stuck at cannot install window,
2. Shift+F10 for command window
3. type lusrmgr.msc to bring up the users control panel
4. set password for disabled administrator account, enable account. exit
5. click OK on cannot install window, system reboots
6. VOILA! Windows!
 
Joined
Jul 10, 2012
Messages
1
Reaction score
0
The easiest fix was from n8r4d3, I thought I was going to have to start over! FYI the command is LUSRMGR.MSC in lower case is couldnt see the "r" so i typed in LUSMGR.msc... Thanks!
 
Joined
Jul 13, 2012
Messages
1
Reaction score
0
The "oobe" thing works on me. Only thing, i came from a fresh install for HP DV6000 with the same issue. Thanks!.
 
Status
Not open for further replies.

Ask a Question

Want to reply to this thread or ask your own question?

You'll need to choose a username for the site, which only take a couple of moments. After that, you can post your question and our members will help you out.

Ask a Question

Top